
Butter Mochi To Die For
[Ad info: Contains Affiliate Links]
I know - how dare I write two food posts in a row. Don’t worry, I’ll be back, tomorrow in fact, with some good old interiors shopping content for you. Two days in a row - who even am I?!
But back to food for a minute. This recipe is too good. Worth documenting here on my blog, and not just on instagram stories for it to disappear into the ether and be forgotten.
Many of you saw my mochi experiments on my Instagram stories and I can promise that this version is infinitely superior to all of my prior attempts - even the one I thought was good.
I went down the mochi / mochi cake rabbit hole and stumbled upon Butter Mochi which is a Hawaiian delight I had never heard of. It was apparently there that coconut milk and butter were first added to glutinous flour and magic happened.
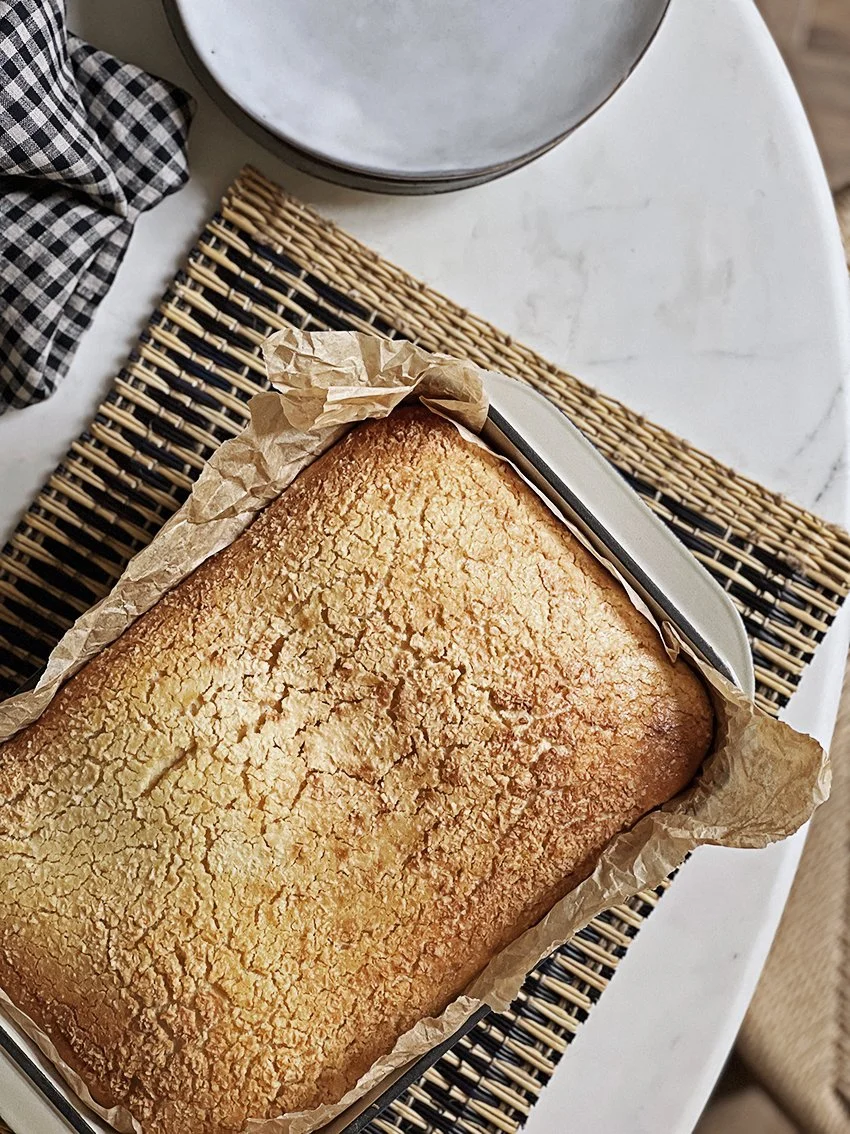
Image: Bianca Hall
Be warned that although this recipe is gluten free (despite the name of the flour), it’s very much NOT healthy - the trick to taking this to the next level was to add copious amounts of sugar and butter.
I had an inkling that condensed milk would be the key here and I was right. I am taking ownership of this recipe as there are loads and loads of Butter Mochi recipes online, all much of a muchness, but I haven’t seen any that use condensed milk, plus I tinkered with the amounts, so that makes this an original recipe, right? I was gobsmacked when it actually worked. Ha!

Image: Bianca Hall
I haven’t tried making Butter Mochi any other way, so I don’t know how the results would differ if you used evaporated milk and more sugar as the traditional recipes call for, though I expect it would still be amazing and possibly even indistinguishable. That said, I’ll stick with my condensed milk version, which I will need to limit to making once or twice a year as I seem to have eaten an obscene amount of it over the past two days. I actually can’t stop.
A few tips…
You HAVE to use GLUTINOUS RICE FLOUR. No other version of rice flour will work. It won’t be mochi, but it might be a tray bake - I don't know. I repeat: you must use glutinous rice flour.
Make sure your baking powder is in date. Believe me, it makes a big difference. Ahem.
The descicated coconut topping is optional. I did it because I had just the right amount left in a bag, but it will still be delicous without.
350 grams glutinous rice flour
100 grams soft brown sugar
1 generous tsp baking powder
1/2 tsp salt
3 eggs
1 can condensed milk (397g)
1 can coconut milk (400mls)
2 tsp vanilla extract
130 grams butter, melted and left to cool
2 tablespoons desiccated coconut (optional)
Dish size is important. Mine is 20 x 29 cms. You could also use a square 24/25cm one.
Line your baking dish with parchment (oil / butter first so it sticks)

Image: Bianca Hall
Add flour, sugar, baking powder and salt to a large mixing bowl and mix well getting rid of any lumps. Crack the eggs into a jug and whisk in the coconut milk. Whisk the egg/coconut mix into flour mix, then add the condensed milk and vanilla extract whisking to combine, then whisk in the melted cooled butter. You want a smooth thick batter.
Pour batter into prepared baking dish and tap a few times on your worktop to get rid of air bubbles, then sprinkle with the desiccated coconut if using.
Bake at 170 (fan / Celsius) for around 45 minutes but keep an eye on it from 35 minutes. You might need a little less or more depending on your oven. Top should be golden brown and the edges should be browned and solid, the middle should still be a little soft.
Leave to cool for 20 mins, then use parchment to slide out onto wire rack to cool completely, before cutting into 20 squares. If you can resist that long. It’s actually even more amazing when it’s still a bit warm.
Will keep for a few days in an air tight container, but doesn’t last longer than two days in our house.
