
'It' Sheepskin Stool DIY
I've seen sheepskin covered stools around for a good while now, but I recently saw an image of Jaime King sitting in a dressing room on a particularly beautiful one that I think was from Jonathan Adler, and had that familiar 'I WANT ONE' pang. Well at just under $2000, I don't think I'll be buying one any time soon, so of course I started to think about a DIY version.

I've dubbed these 'It' stools, because they remind me of Cousin It from the Addams Family, but they are also everywhere at the moment, and with good reason. They add a bit of glamour and fun to any room, they don't take up much space, but are great for extra seating when needed. Exactly what I'd decided our living room was lacking. I'm certainly not the first to do this DIY, but this is how I tackled it.
I began my hunt for something to transform on eBay (of course), and found a fab pair of little mid-century side tables for £20.00 (plus, £10 delivery, so let's call it £15 a piece). They were the perfect shape and size to re-purpose as stools.
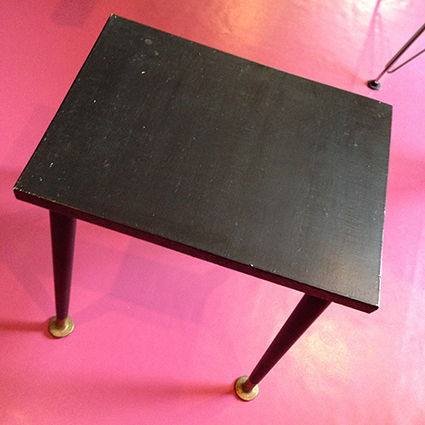
When they arrived, my intention was to give the legs a quick sand before spray painting them gold. However, much to my surprise, when I started sanding, the black paint quickly turned to dust, revealing the bare wood beneath.
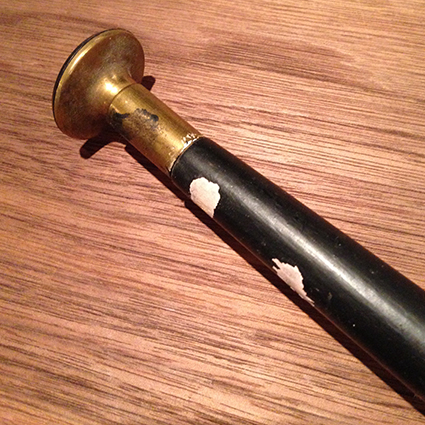
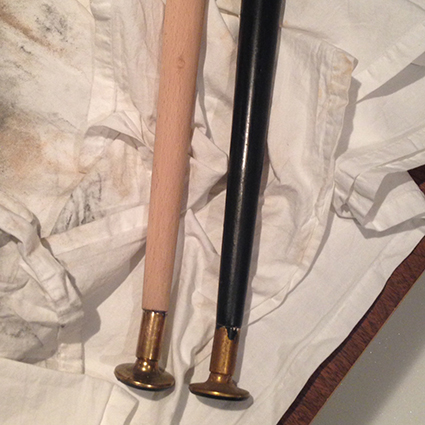
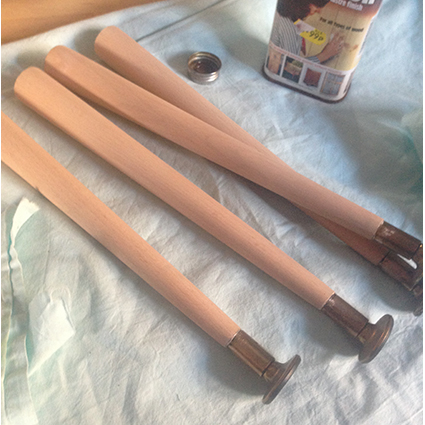
Now I'm not one to shy away from painting wood, but it just didn't seem to be the right thing to do as it was in perfect condition under that bad black paint job, and such a lovely colour. I still can't believe how easily the paint came off - just ten minutes sanding by hand per leg, so I decided to hold off with the spray paint, and give them a few coats of Danish Oil instead.
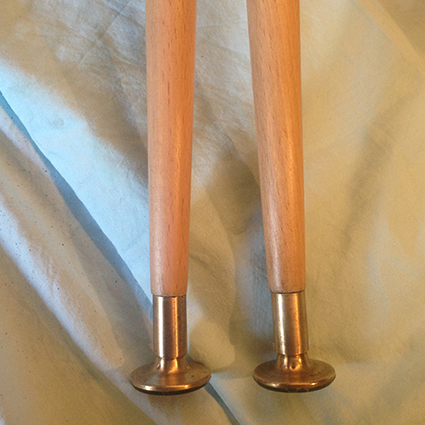
The cups and feet didn't shine up as much as I'd hoped, so I might give them the gold spray paint treatment instead, but the jury's out on that one, so I'm leaving them for now.
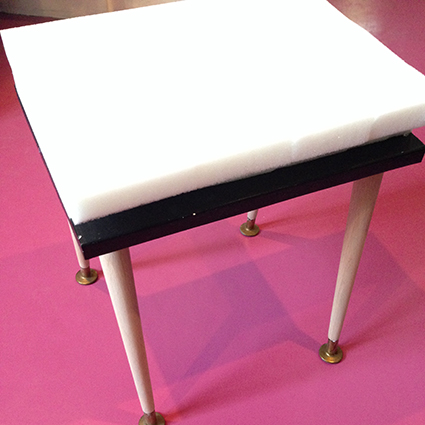
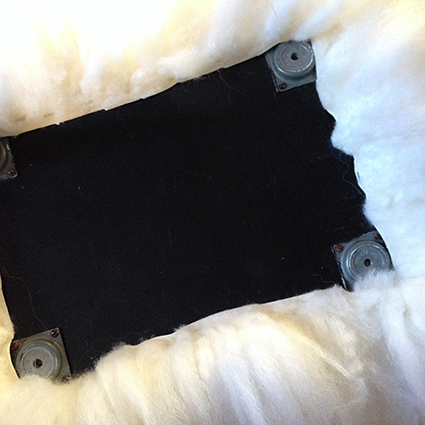
I was lucky that my job was made super easy by the fact that the legs unscrew. I decided not to remove the plates that the legs screw into, because I'm lazy like that. I just didn't want to make the job harder, so I worked around them instead which was pretty easy. Besides, not many people will be inspecting the underside of these - they'll be too busy marvelling at their beauty.

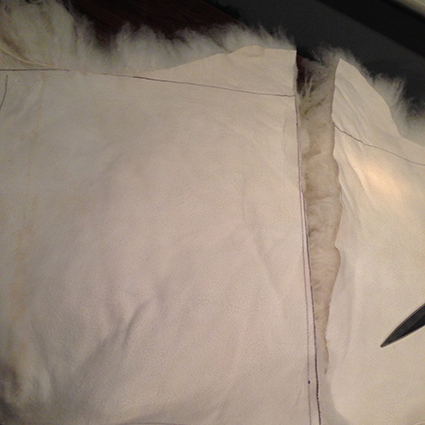
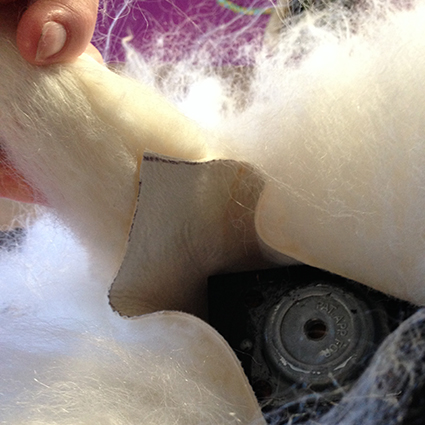
I traced around the tops, and cut foam pieces (about 3cms thick) to size, which I stuck on with spray adhesive. Next I cut the Mongolian Sheepskin - another eBay purchase - to fit. The rectangles need to be large enough to cover the top and sides, leaving a few centimetres over-hang for securing it with staples. I admit I did have second, and possibly third thoughts about cutting the sheepskin up - it was SO beautiful, fluffy and soft! I think I'll have to buy another one soon to help me get over the trauma...
Then I got busy with my staple gun. I knelt on the tops as I went, making sure to pull tightly and evenly - I did the sides first and just trimmed the excess off the corners before securing the edges around the leg plates. This is a super easy upholstery job - the sheepskin hides pretty much everything.

Once both skins were secured, I screwed the legs back on and stood back and marvelled at their beauty. Told you.
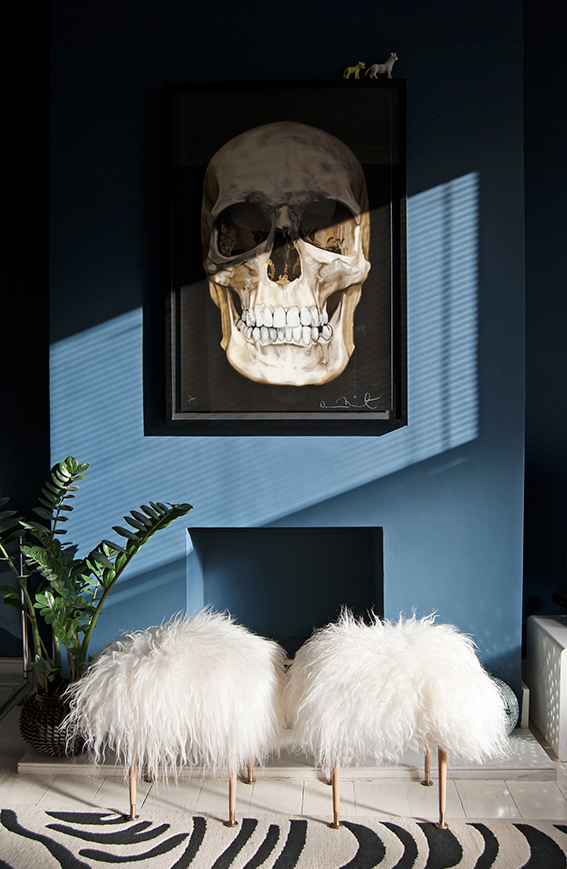
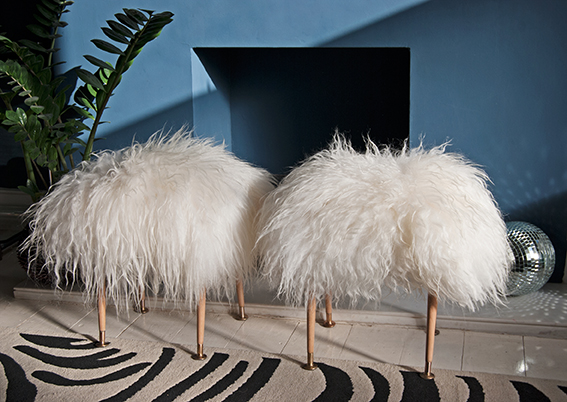
I'm super happy with these - a particularly quick, easy and satisfying DIY. They make for great occasional seating and a lovely bit of eye-candy. And eye-candy is something we all need.
The overall cost? £42.50 each. Not bad huh?